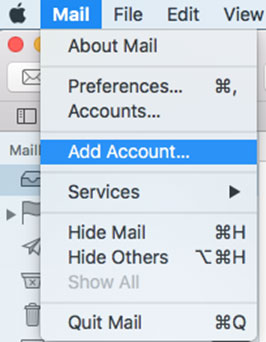
Step 1: Launch Mail App. From the toolbar at the top, select Mail and then Add Account
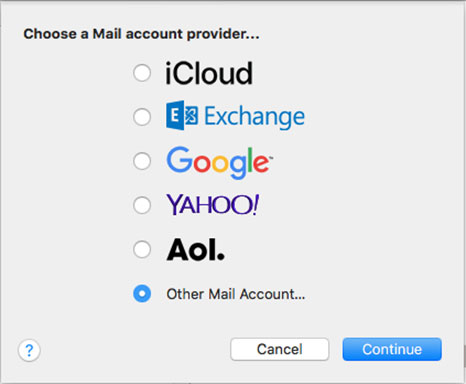
Step 2: You can choose the automatic configuration of the email for the known used email accounts from the list and if you do not, you should choose Other Mail Account and setup your email manually
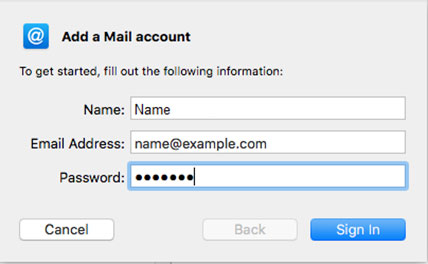
Step 3: Enter your details and then click Sign In
- Your name : Type your name. This is the name of the sender in email messages that you send from this account
- Email address : Full NETSCAPE.NET email address
- Password : Email account password
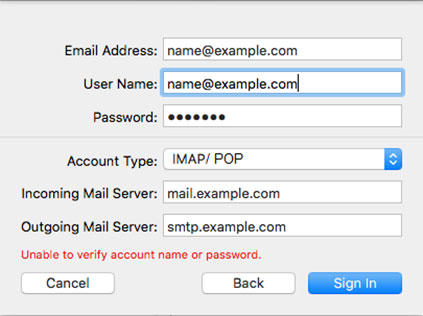
Step 4: Complete the settings as follows and click Sign In
- Email Address & User Name: Your full yourdomain.tld email address
- Password: Your yourdomain.tld password
- Account Type is IMAP or POP according to preference (IMAP is the default).
- Incoming Mail Server Host Name for yourdomain.tld is mail.yourdomain.tld
- Outgoing Mail Server Host Name for yourdomain.tld is mail.yourdomain.tld
- For domains still in transfer or propagation, temporarily use the IP Address in place of Incoming & Outgoing Mail Server
- Ignore Unable to verify account name or password
Step 5: Ignore the 2 server identity messages > Continue. You can add the certificate to your trust settings to avoid seeing this message in the future.
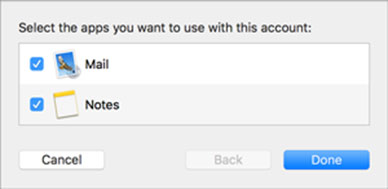
Step 6: Select any apps > Done
Congratulations! You are all done here and ready to use your email account on your Apple Mail.

